OWASP ZAP: A Comprehensive Guide to Web Application Security Testing

- Category: CTI
- Source article: https://medium.com/@1200km/owasp-zap-a-comprehensive-guide-to-web-application-security-testing-6c247f4be39b
- Published: 2024-11-12
- Preserved media: 14 image(s), including cover images, screenshots, diagrams, and infographics where present.
- Preserved technical blocks: 0 code/configuration block(s).
Ecosystem Fit
This page mirrors the original Medium article into the 1200km.com Docusaurus ecosystem. The original article flow, images, screenshots, infographics, and technical blocks are preserved from the export.
Using OWASP ZAP for Identifying and Mitigating Web Application Vulnerabilities
Introduction to OWASP ZAP
OWASP ZAP (Zed Attack Proxy) is a powerful, open-source tool designed for web application security testing. Created by the Open Web Application Security Project (OWASP), ZAP helps identify common vulnerabilities, including SQL injection, cross-site scripting (XSS), and more. It is widely used by developers, security professionals, and testers, thanks to its user-friendly interface and extensive feature set, which includes automated scanners, passive scanning, and manual testing tools.
In this post, I will explain only the basic automated scan and the full automated scan, covering how to use these scans to identify common security vulnerabilities quickly.
Legal Use Disclaimer
OWASP ZAP is a security testing tool intended for authorized use only. Unauthorized scanning or testing of web applications, networks, or systems without the explicit consent of the owner is illegal and may violate cybersecurity laws. Users must ensure they have obtained necessary permissions before conducting scans or assessments on any target system.
This article and information are provided for educational purposes to promote security awareness and best practices. The author and publisher do not endorse or condone illegal activities and are not responsible for any misuse of this information. Always follow ethical hacking guidelines and comply with applicable laws and regulations.
Installation Guide for OWASP ZAP
ZAP is available for multiple operating systems, including Windows, macOS, and Linux. Installation steps vary slightly based on the OS:
-
Download ZAP:
-
Select the appropriate version for your operating system.
2. Install:
-
Windows: Run the downloaded installer and follow the instructions.
-
macOS: Unzip the downloaded file and move it to the Applications folder.
-
Linux: Unzip the downloaded file and run the ZAP executable.
3. Launch ZAP:
- Open ZAP and configure your browser’s proxy settings to route through ZAP’s local proxy (usually
localhost:8080) to intercept traffic.
Basic Automated Scan
Step 1: Launch OWASP ZAP
-
Open OWASP ZAP on your computer.
-
On theQuick Starttab, you’ll see options for different types of scans, including the Automated Scan.

For ZAP to capture traffic and run scans effectively, configure your browser to use ZAP as a proxy.
-
Set the browser’s proxy settings to
localhoston port8080(ZAP’s default proxy). -
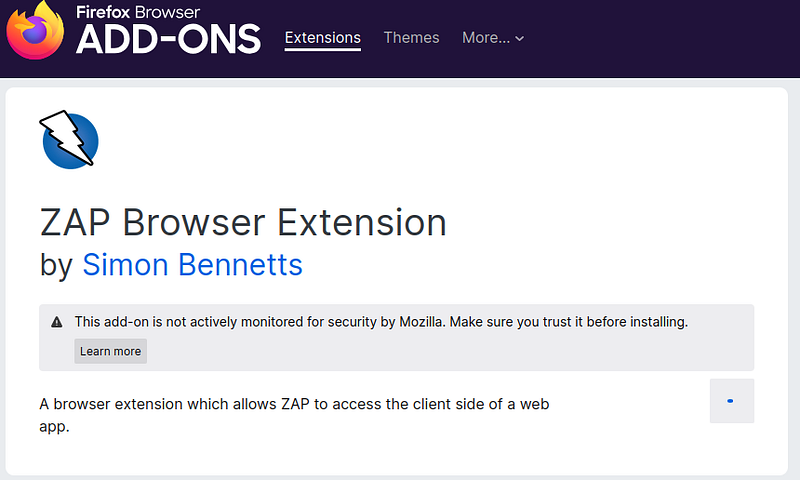
Alternatively, you can use theOWASP ZAP Browser Extensionif available for your browser, which will automatically set up the proxy configuration.
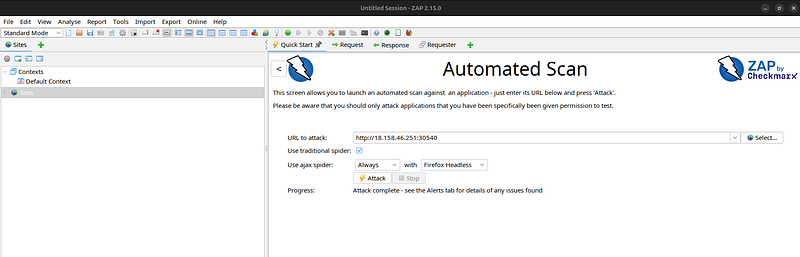
Step 3: Enter the Target URL
-
Go to theQuick Starttab in ZAP.
-
In theURL to attackfield, enter the full URL of the target website (e.g.,
[http://example.com](http://example.com%29)). -
Select theAttack ModeasActive Scanfor ZAP to perform an active vulnerability scan on the target.

Step 4: Run the Basic Scan
-
Click theAttackbutton to initiate the basic scan.
-
ZAP will start by crawling the website and identifying available pages, forms, and parameters.
-
It will then automatically scan for vulnerabilities, looking for issues like missing security headers, exposed files, and basic injection flaws.
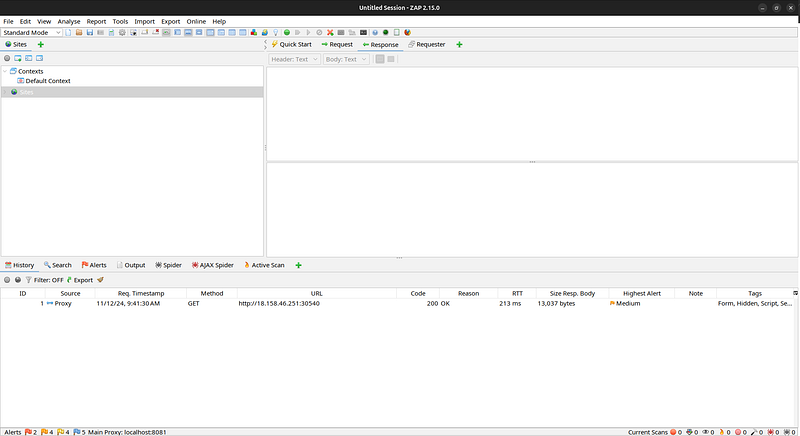
Step 5: Monitor the Scan Progress
In theSitesandAlertspanels:
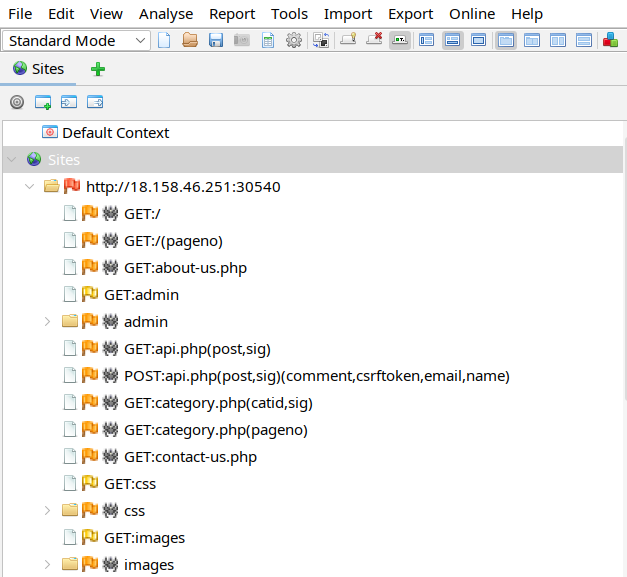
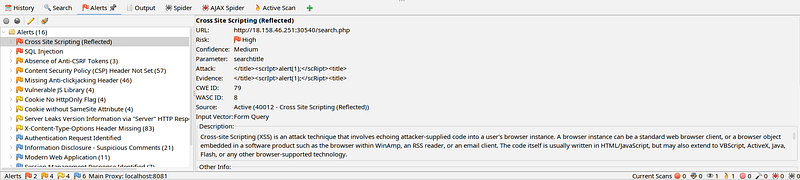
- Sites Panel: Shows the structure of the target site, including all discovered URLs and resources.
- Alerts Panel: Displays identified vulnerabilities as the scan progresses. Each alert includes details on the issue, risk level (high, medium, low), and recommendations.
Step 6: Review the Results
-
After the scan completes, go to theAlertstab to view a summary of the findings.
-
Click on each alert to see more details, including:
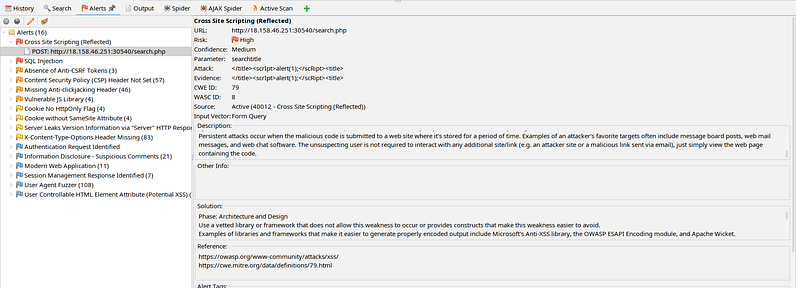
-
Description: Information about the vulnerability.
-
Affected URL/Parameters: Specific locations where the vulnerability exists.
-
Risk Level: Severity of the vulnerability.
-
Remediation Advice: Suggested fixes for the issue.
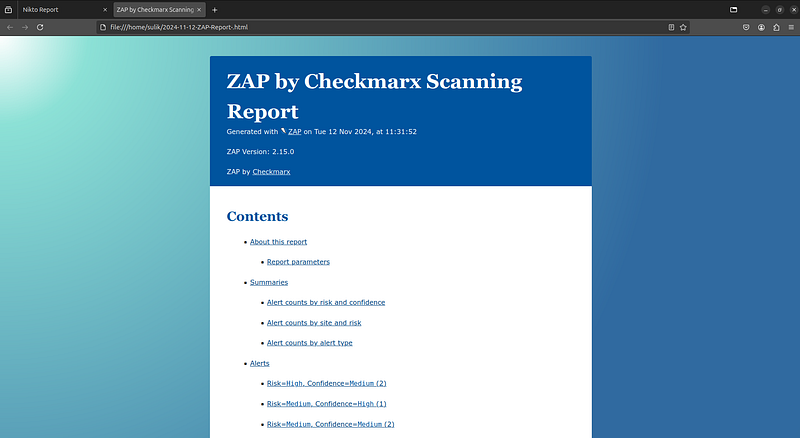
Step 7: Save the Report
To generate a report for documentation or analysis:
- Go toReport > Generate Report.
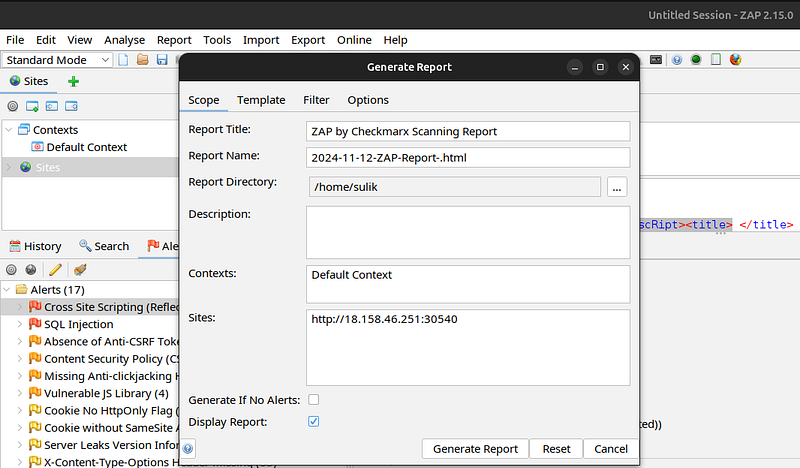
- Choose your preferred format (HTML, XML, etc.) and save it.
Deep Scan
Step 1: Launch OWASP ZAP and Set Up the Environment
-
Open OWASP ZAP.
-
Ensure your browser is configured to use ZAP as a proxy (typically
localhost:8080) so it can capture all traffic and requests.
Step 2: Configure the Deep Scan Settings
Spider Configuration:
- Increase Depth Levels: By default, the spidering (crawling) depth may be limited. Go toTools > Options > Spiderand adjust the depth level by setting it to a higher value, such as
5or more, to explore the site more deeply. Maximum Depth to Crawl — 0.

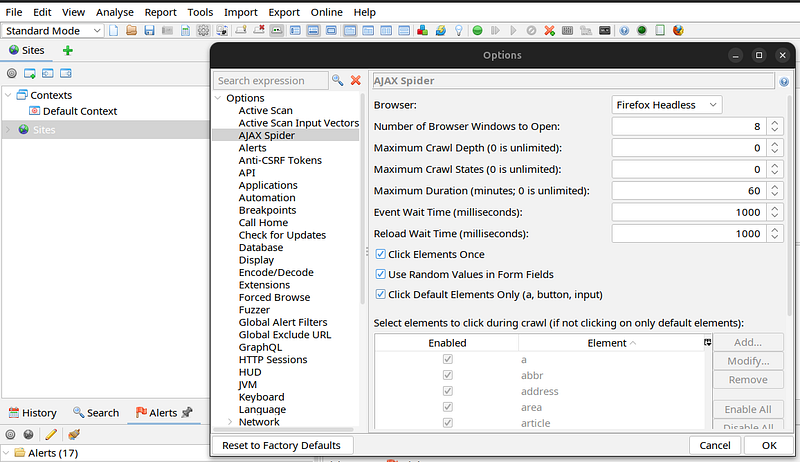
Enable AJAX Spidering: For JavaScript-heavy sites or Single Page Applications (SPAs), enableAJAX SpideringunderTools > Options > AJAX Spider. This will allow ZAP to find pages and resources loaded dynamically with JavaScript.
Active Scan Policy:
-
Go toAnalyze > Scan Policy Managerto access the scan policy settings.
-
Select theDefault Policyor create a new custom policy.
-
Enable all scan rules by setting each category (Injection, Authentication, etc.) toHigh. This ensures that the scan will cover all vulnerability types with the highest level of detail.
Attack Strength:
-
In the sameScan Policy Managerwindow, set theAttack StrengthtoInsaneorHigh. This setting controls how many payloads (test cases) ZAP uses for each vulnerability type, increasing the depth and thoroughness of testing.
-
Be aware that this can significantly increase scan time and server load.

Step 3: Initiate the Full Automated Scan
-
Enter the Target URL:
-
In theQuick Starttab, enter the full URL of the target web application.
-
Enable Attack Mode:
-
Switch toAttack Modeby clicking on the small icon (red target icon) in the toolbar. Attack Mode ensures ZAP actively scans any site or URL visited in your browser, automatically performing deeper scans on each component found.
Step 4: Perform the Active Scan
-
In theSitespanel, right-click on the target site.
-
SelectAttack > Active Scan
-
ChooseDefault Policyor your customDeep Scan Policyfrom the dropdown, ensuring that all previously configured deep scan rules and attack strength settings are applied.
-
ClickStart Scan.